White Chocolate Pink Fudge with Heart Sprinkles Recipe

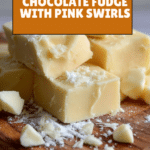
This White Chocolate Fudge recipe is a delightful layered treat featuring creamy white chocolate infused with pink food coloring and topped with beautiful swirling gel icing and heart-shaped sprinkles. Perfect for holidays, celebrations, or gifting, this no-bake fudge sets quickly in the refrigerator and combines smooth textures with visually appealing colors.
- Prep Time: 10 minutes
- Cook Time: 5 minutes
- Total Time: 2 hours 15 minutes
- Yield: 16 pieces 1x
- Category: Dessert
- Method: No-Cook
- Cuisine: American
- Diet: Vegetarian
Ingredients
Scale
White Chocolate Fudge Layers
- 3 1/2 cups white chocolate chips, divided
- 14 ounces canned sweetened condensed milk, divided
- 2 tablespoons unsalted butter, divided
- Pink or Red Food Coloring (about 8 drops for first layer)
Toppings
- Pink or Red Gel Icing (a few drops)
- 1 tablespoon heart-shaped sprinkles
Instructions
- Prepare the pan: Line an 8×8 square pan with parchment paper or foil and lightly spray with non-stick spray to prevent sticking.
- Make pink fudge layer: In a microwave-safe bowl, combine half of the white chocolate chips, half of the sweetened condensed milk, and half of the unsalted butter. Microwave in 20 second bursts, stirring in between until melted and smooth, about 1-2 minutes total. Do not overheat to avoid burning.
- Add food coloring: Stir in 8 drops of pink or red food coloring until fully incorporated and the mixture is smooth and evenly colored.
- Set pink layer: Pour the pink fudge mixture into the prepared pan and smooth with a spoon or offset spatula. Place the pan in the freezer while you prepare the next layer to help it set quickly.
- Make white fudge layer: In another microwave-safe bowl, combine the remaining white chocolate chips, sweetened condensed milk, and unsalted butter. Microwave in 20 second bursts, stirring in between until melted and smooth.
- Pour white fudge layer: Pour the white fudge over the pink layer in the pan, smoothing the top gently with a spoon or offset spatula.
- Decorate top: Add a few drops of pink or red gel icing evenly across the top of the white fudge. Use a toothpick to swirl the gel into pretty patterns on the surface.
- Add sprinkles: Sprinkle heart-shaped sprinkles evenly on top of the fudge.
- Chill and serve: Cover the fudge with plastic wrap and refrigerate for at least 2 hours to set. Once firm, remove from the pan using the parchment or foil edges and slice into 16 squares for serving.
Notes
- Use high-quality white chocolate chips for a smoother and richer fudge.
- Microwave times may vary; stir frequently to avoid burning the chocolate.
- Ensure layers are slightly firm before pouring the next to prevent mixing colors.
- Can be stored in an airtight container in the refrigerator for up to 1 week.
- For a firmer texture, chill longer in the freezer before slicing.
Keywords: white chocolate fudge, no-bake fudge, layered fudge, pink fudge, holiday sweets, homemade fudge recipe, creamy white chocolate fudge