Elegant White Chocolate Mousse Tart Recipe
Introduction
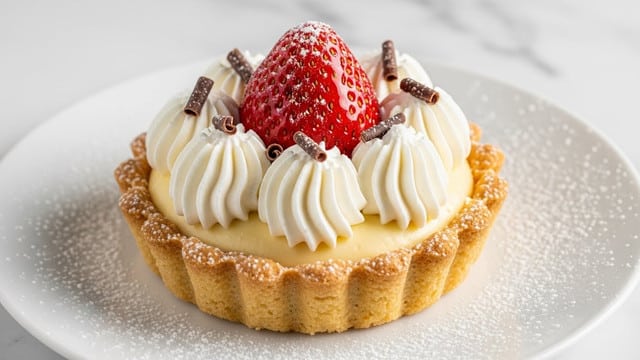
This elegant white chocolate mousse tart is a perfect dessert for special occasions or when you want to impress guests. It combines a crisp, spiced crust with a rich, creamy white chocolate mousse, topped with fresh berries and delicate chocolate curls.
Ingredients
- 1 1/4 cups (150g) all-purpose flour
- 1/4 cup (30g) powdered sugar
- 1/2 teaspoon ground cinnamon
- 1/4 teaspoon ground nutmeg
- 1/4 teaspoon salt
- 1/2 cup (113g) cold unsalted butter, cubed
- 1 large egg yolk
- 1–2 tablespoons cold water
- 8 ounces (225g) high-quality white chocolate, chopped
- 1 cup (240ml) heavy cream, chilled
- 1/4 cup (60ml) milk (whole or 2%)
- 1 teaspoon pure vanilla extract
- 1/2 teaspoon unflavored gelatin (optional, for extra stability)
- Fresh raspberries, strawberries, or blueberries
- White chocolate curls or shavings
- Mint leaves for garnish
- Light dusting of powdered sugar
Instructions
- Step 1: In a large mixing bowl, combine the flour, powdered sugar, cinnamon, nutmeg, and salt. Whisk to blend evenly.
- Step 2: Add the cold butter cubes. Use a pastry cutter or your fingertips to rub the butter into the flour mixture until it resembles coarse crumbs.
- Step 3: Add the egg yolk and 1 tablespoon cold water. Mix gently with a fork, adding more water only if needed for the dough to hold together when pinched.
- Step 4: Form the dough into a disk, wrap it in plastic wrap, and chill in the refrigerator for at least 30 minutes.
- Step 5: Preheat your oven to 350°F (175°C).
- Step 6: Roll out the chilled dough on a lightly floured surface to fit a 9-inch tart pan with a removable bottom.
- Step 7: Press the dough gently into the tart pan and trim any excess from the edges.
- Step 8: Prick the base with a fork, line it with parchment paper, and fill with pie weights or dried beans.
- Step 9: Bake the crust for 15 minutes. Remove the parchment paper and weights, then bake for another 10 minutes or until golden brown.
- Step 10: Let the crust cool completely on a wire rack.
- Step 11: If using gelatin, sprinkle it over 1 tablespoon of cold water in a small bowl and let it bloom for 5 minutes.
- Step 12: Heat the milk in a small saucepan until just simmering (do not boil). Remove from heat and stir in the bloomed gelatin until dissolved.
- Step 13: Add the chopped white chocolate to the warm milk. Let it sit for a minute, then stir until smooth and melted.
- Step 14: Stir in the vanilla extract and allow the mixture to cool to room temperature.
- Step 15: In a large bowl, beat the chilled heavy cream to soft peaks using a hand mixer.
- Step 16: Gently fold the whipped cream into the cooled white chocolate mixture in batches, taking care not to deflate the mousse.
- Step 17: Spoon or pour the mousse into the cooled tart shell and smooth the top with an offset spatula or back of a spoon.
- Step 18: Refrigerate the tart for at least 4 hours, or until the mousse is fully set and firm to the touch.
- Step 19: Before serving, decorate the tart with fresh berries, white chocolate curls, mint leaves, and a light dusting of powdered sugar if desired.
Tips & Variations
- Use high-quality white chocolate for the richest, creamiest mousse.
- For a nutty twist, sprinkle toasted almonds or pistachios over the top before serving.
- If you prefer a firmer mousse, include the gelatin as directed; otherwise, you can skip it for a softer texture.
- Swap out fresh berries for a drizzle of raspberry sauce for an added burst of tartness.
Storage
Store the tart covered in the refrigerator for up to 3 days to keep the mousse fresh and the crust crisp. Reheat is not recommended as it will affect the mousse texture. Serve chilled for the best flavor and presentation.
How to Serve

Serve this delicious recipe with your favorite sides.
FAQs
Can I make the tart crust ahead of time?
Yes, you can prepare and bake the tart crust up to 2 days in advance. Wrap it tightly in plastic wrap and keep refrigerated until ready to fill.
What can I use if I don’t have gelatin?
If you don’t have gelatin, the mousse will still set nicely thanks to the whipped cream and chocolate, but it might be a bit softer and less stable. Chill it longer to help firm it up.
PrintElegant White Chocolate Mousse Tart Recipe

This Elegant White Chocolate Mousse Tart combines a delicate spiced buttery crust with a smooth, creamy white chocolate mousse filling. Finished with fresh berries, white chocolate curls, and mint for a stunning dessert that’s perfect for special occasions or an impressive treat.
- Prep Time: 25 minutes
- Cook Time: 25 minutes
- Total Time: 5 hours 50 minutes
- Yield: 8 servings 1x
- Category: Dessert
- Method: Baking
- Cuisine: French-inspired
- Diet: Vegetarian
Ingredients
For the Tart Crust
- 1 1/4 cups (150g) all-purpose flour
- 1/4 cup (30g) powdered sugar
- 1/2 teaspoon ground cinnamon
- 1/4 teaspoon ground nutmeg
- 1/4 teaspoon salt
- 1/2 cup (113g) cold unsalted butter, cubed
- 1 large egg yolk
- 1–2 tablespoons cold water
For the White Chocolate Mousse Filling
- 8 ounces (225g) high-quality white chocolate, chopped
- 1 cup (240ml) heavy cream, chilled
- 1/4 cup (60ml) milk (whole or 2%)
- 1 teaspoon pure vanilla extract
- 1/2 teaspoon unflavored gelatin (optional, for extra stability)
For Decoration
- Fresh raspberries, strawberries, or blueberries
- White chocolate curls or shavings
- Mint leaves for garnish
- Light dusting of powdered sugar
Instructions
- Combine dry ingredients: In a large mixing bowl, whisk together flour, powdered sugar, cinnamon, nutmeg, and salt until well blended.
- Incorporate butter: Add cold cubed butter to the dry mixture. Using a pastry cutter or fingertips, rub the butter into the flour until the mixture resembles coarse crumbs.
- Add egg yolk and water: Mix in the egg yolk and 1 tablespoon cold water gently with a fork. Add an additional tablespoon of cold water only if necessary for the dough to hold together when pinched.
- Chill the dough: Form the dough into a disk, wrap in plastic wrap, and refrigerate for at least 30 minutes to firm up.
- Preheat oven: Set oven to 350°F (175°C) to prepare for baking the crust.
- Roll out dough: On a lightly floured surface, roll out the chilled dough to fit a 9-inch tart pan with a removable bottom.
- Fit dough into pan: Press the dough gently into the tart pan, trimming any excess dough from the edges.
- Prepare for blind baking: Prick the base of the crust with a fork, line with parchment paper, and fill with pie weights or dried beans to prevent bubbling.
- Blind bake crust: Bake for 15 minutes, then remove parchment paper and weights. Bake an additional 10 minutes until crust is golden brown.
- Cool crust: Transfer to a wire rack to cool completely before filling.
- Bloom gelatin (optional): Sprinkle gelatin over 1 tablespoon cold water, let sit for 5 minutes to soften.
- Heat milk and dissolve gelatin: Gently heat milk until just simmering (do not boil). Remove from heat and stir in bloomed gelatin until fully dissolved.
- Melt white chocolate: Add chopped white chocolate to warm milk mixture. Let sit for a minute then stir until smooth and melted.
- Add vanilla and cool: Stir in vanilla extract and allow mixture to cool to room temperature.
- Whip cream: Using a hand mixer, beat chilled heavy cream in a large bowl to soft peaks.
- Fold cream into chocolate: Gently fold whipped cream into the cooled white chocolate mixture in batches, taking care to retain the airiness of the mousse.
- Fill tart shell: Spoon or pour the mousse into the cooled tart crust and smooth the surface using an offset spatula or the back of a spoon.
- Chill mousse tart: Refrigerate the tart for at least 4 hours, or until the mousse is fully set and firm.
- Decorate and serve: Before serving, garnish with fresh berries, white chocolate curls, mint leaves, and a light dusting of powdered sugar for an elegant finish.
Notes
- Using high-quality white chocolate significantly enhances the mousse’s flavor and texture.
- The gelatin is optional but recommended for extra mousse stability, especially if you plan to serve the tart at room temperature.
- Blind baking the crust prevents it from getting soggy once filled with mousse.
- Ensure the heavy cream is well-chilled before whipping for better volume and texture.
- You can substitute fresh berries according to season and preference.
- Store the tart in the refrigerator and consume within 2 days for best freshness.
Keywords: white chocolate mousse tart, white chocolate dessert, mousse tart, elegant tart recipe, baked tart crust, creamy mousse dessert